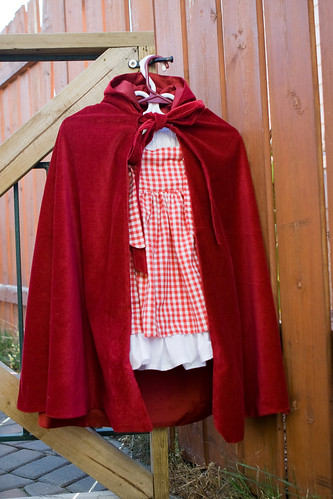
I don't think I can even express how happy I am that this costume if
finally completed! It went from a project that I thought was going to be fairly easy, to something that got fairly complicated fast.
I've posted about the dress and over-skirt and how the pattern was not as comprehensive (at least I felt so) to doing the cloak, which really did not have much of a pattern to it at all.
The cape part of it was pretty easy, measure the length of my kid from her shoulders to where I wanted the cloak to end, cut on the fold, repeat for the lining, then sew both together. The hood though, well that was a whole other matter.
The pattern I followed for the cloak was for an adult, so the hood measurements were wayyyy too big. I then found one on
Marthastewart.com, however, it was too small and when I increased the measurements, it looked a bit too KKK with such a pointy hat.
So after a few adjustments, guessing the measurements and doing a trial 'hood' bc my daughter was not being very cooperative about trying it on, I followed the directions on MS's site, but then curved the top of the hood so it was not pointy but rounded. :0)
Looking back on this project, it really was not that hard. The satin is a pain to sew bc it moves and I do not have a walking foot for my machine, and figuring out measurements was a bit mind boggling, but I'm pretty proud of how it turned out.
Details:
Peasant Dress or Top - I purchased the pattern from a seller on Etsy and bought 2m of white cotton fabric for I think 7.99 at my local fabric store. I had a bit left over but not a lot. I used a crazy amount of it on the ruffle along the bottom of the dress. I've debated adding lace to the sleeves, but I think it's fine as is. :0)
Over-skirt - I bought this pattern from the same seller as the peasant dress from. I bought 1.5m of Red Gingham Cotton Fabric at the same Local Fabric store. I had some left over, but not a lot. I think it was 12.99/m?
Cloak - I used both this
pattern and this
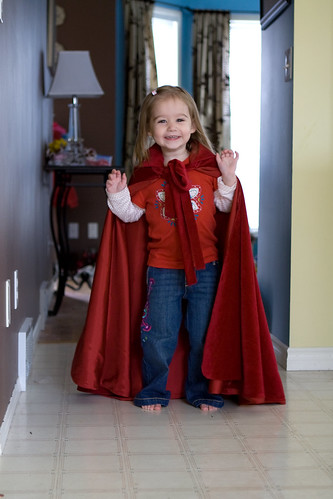
pattern and then in the end basically designed my own hood to suit my needs and fit Tasha's head. hah For the cloak I used a 36" length and 1/4" in seam. I bought a deep cranberry red velvet (2 metres) for the outer part of the cloak and then lined it with a deep red Satin(3 metres). I had to get more of the satin then I really wanted because it was only a width of 27" and I needed 36" so I was not able to fold it and cut it out. :0( Sewing the two fabrics together was a huge PITA because the satin is so slippery. I can't remember the price on the Velvet, I think $20/m? or the Satin. I spent way more then I wanted, but I knew I wanted a nice lush cloak. She loves wearing it so I figure it will be used for dress up after halloween. Of course today she was flying around the house with it on saying she was a super hero. haha
I had a bit of trouble with the ties on the cloak, but this morning was able to figure it out. I sewed the hood on to the velvet first, then turned it inside out, and sewed it again, leaving an opening to turn it right side out again. That's when I realized the excess fabric on the hood would work for casing in the tie. :0) I
knew I had to do some sort of casing, but could not wrap my head around how to do it hem the hood in. hah Thankfully baby brain eased up and I figured it out.
Anywho, it's done and I could not be happier with the end result. :0) Some pics of the doodlebug in it. I did not have the energy to get her in the complete outfit (dress/over-skirt/cloak), but will be sure to get some pics on Halloween. :0)


 A couple of times now I've made cards for a friend. She owns an amazing business and once in a while will attend trade shows and request cards for her clippos. The last time I did Birthday cards for her and this time I did up 20 Christmas cards.


